Showing posts with label Ann Craig.. Show all posts

Thursday, 27 June 2019

Scrap Page Embellishments With To A Wild Rose Bundle

Scrap book pages can be works of art. They are created with love and are lasting reminders of events in our lives. I have used "To A Wild Rose" stamp set by Stampin' Up! to create the main embellishments for this page. 


Each month I hold a scrap class where I provide a scrap map and a number of suggestions for the participants to create around that map. This month we were tasked to use one of the many beautiful Designer Series Papers that Stampin' Up! has provided in the 2019 - 20 Annual Catalogue.

I chose one of the gorgeous papers from the Perennial Essence pack. I love the colours and the homage to Monet in these designs, and the paper colours worked perfectly with my photo.


Along with the To A Wild Rose images I used First Frost and dies from the Flourish die set. It's great when you have a selection of dies and images to choose from and with Stampin' Up! you can be sure to find something that coordinates really well.

I finished off the design with a large "M" the first letter of this little one's name. I cut this with the Large Letter Framelits - cutting the M 4 times and adhering one on top of the other to make it sturdy. The M was cut in Purple Posy card stock and enhanced with Wink of Stella glitter pen. 


If you don't have a lot of time and still love to create scrap pages, you might think about using some of the beautiful Stampin' Up! Designer Series papers as a base. There is a huge variety to choose from and you can see all of them at my on-line store. If you live in Australia and would like to purchase products  you are most welcome to do so via my store.

Until Next Time
Happy Crafting!

Thursday, 3 January 2019

Sale-A-Bration | Lovely Lattice Stamp Set by Stampin' Up!

I'll be posting a few inspiration videos from Stampin' Up! over the next few days.
 See what you can do with the FREE SALE-A-BRATION ITEMS 


This video features the beautiful Lovely Lattice set. I received this stamp set as a gift in Orlando at the Stampin' Up! 30th Anniversary Event.


If you are in Australia you can order on-line. All the products can be viewed on-line


 If you would love to earn more free product, think about Hosting your own Workshop.
Hosts will earn an additional  $40 in Stampin' Rewards with a $400+ workshop, so get your friends together and give me a call.


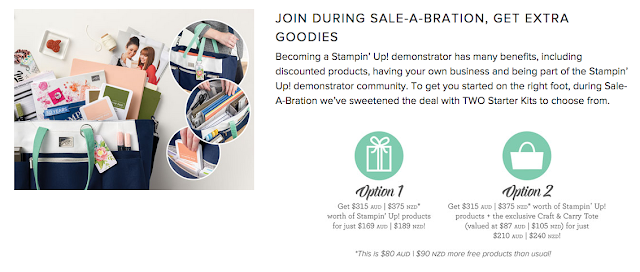
 And if you want it all, I'd love you to join my team of demonstrators. There are special rewards during Sale-A-Bration and you have the opportunity to purchase the exclusive Craft and Carry Tote

http://www.stampinup.net/esuite/home/anncraig/jointhefun

You can see this is the perfect time to join Stampin' Up! ready to start the New Year with something awesome for yourself.

Check back soon for more ideas using the Free SAB products,

Until then,
Stay crafty!

Tuesday, 15 May 2018

Petal Passion Memories and More Cards

Today I'm sharing a very quick card made from one of the images from the Petal Passion Memories and More card kit. This is a fabulous kit that has many stylish images ready for you to use as they come, or add extra stamping and embellishments to create a stepped up card.


The images vary, but mainly come in black and white. Sometimes you'll find some Powder Pink used too. This limited colour range gives you incredible scope to create a wonderful variety of cards. I have combined the floral image with Silver Glimmer paper, Basic Black card and Petal Passion Designer Series Paper on a Thick White card base.
So quick and simple!


I finished the card with some Vintage Crochet Trim - a bargain on the Clearance Rack, and a little silver cord.  A simple greeting and a tiny heart from the Metallic Enamel Shapes and the card is complete.

I love this card and I really love how quick it was to make. If you would like to order any of the products mentioned, simply follow the links throughout the post. You'll see pictures and all the information about price. Order on-line and don't forget to use the code to be in the running to win a Stampin' Up! shopping spree.

http://www3.stampinup.com/ECWeb/default.aspx?d bwsdemoid=4000044

Until Next Time

Stay Crafty

Wednesday, 19 October 2016

Creating Brick Wall Cards with Stampin' Up!

The Brick Wall technique is always fun as it has an element of serendipity about it - and we all love surprises don't we? I used this technique at a recent class where we created a mystery card. That is there was no sample and I instructed step by step so my class didn't really know what to expect. 

I had fun but I'm sure some of the class members really wanted something to copy! 

I added a couple of twists to the basic technique by clear embossing the image onto Whisper White card, then spritzing with a variety of colours.


You can see how the ink seeps in behind the clear embossing to create an interesting effect. When you have the colours and effects you want, simply draw a brick wall pattern on the back of the Stamped image and cut with your Stampin' Trimmer to create the bricks. Sponge around the edges of each brick with one of the colours used for spritzing. Then it is a matter of putting the "bricks" back together with a small amount of space between them (like a brick wall) and adhering them to the background


The finished card has some additional stamping on the background using a stamp from Stampin' Up!'s Timeless Textures. I matted this onto a white card base, thus helping to bring out the white of the embossing. 

I also did a simpler version of the Brick Wall by Stamping with Memento black ink onto newsprint paper. Quite a different look despite using  similar techniques.


Silhouette stamps are the easier option when doing this technique, but it also looks great with multi coloured stamps.

I'll add a list of Stampin' Up! products used  and if you need any of them to create your own cards, you are welcome to contact me via my website, or place an on-line order with me if you live in Australia. If placing an on-line order use the HOSTESS CODE (top right side bar) and you may be eligible for some additional product. Your order will be sent directly to your home address. Postage costs apply.

Until nest time,

Happy Stamping


Friday, 16 September 2016

Stampin' Up! Seasonal Bells Christmas Card

One of the fantastic new bundles from the Stampin' Up! Holiday Catalogue combines a versatile stamp set and a punch.  I love punches as they are so easy and quick to use with your stamped images.

The Seasonal Bells stamp set combines a variety of images of bells with some attractive greetings so you can make lovely Christmas Cards for your family and friends. 


One of the hidden gems in the Stampin' Up! Annual Catalogue is the new Petal Burst Embossing Folder. I've used it as a background texture on my card, but if you turn it over to the back you will get a totally different and rather lovely result that is more of an abstract pattern. I really had to think twice about which side to use on this card. 

The bells are stamped and coloured with an Aqua Painter and Classic Inks, punched out and adhered to another new item - the Delicate White Doilies. Add a glimmer banner and you have a quick and easy card.

This project shows how products from both our current catalogues work well together. You can purchase any of these products via my on-line store   (if you are an Australian citizen) and you'll find a list of the items needed below. 

It is just about time for everyone to be working on their Christmas Cards, so contact me if you'd like further information.

Until then

Happy Crafting


Tuesday, 3 May 2016

Mothers Day Card with Butterfly Basics & Gorgeous Grunge

Mothers Day has snuck up on me this year - I thought I had another week, until I received a lovely card in the mail from one of my daughters. Eek, that meant I needed to get a card in the mail for my dear mum who lives interstate. 

Luckily I made this card with her birthday in mind, last week, and although it was originally a Birthday card, it was easy enough to remove the greeting and add a different one. I have another week until her birthday!!!

I used the very versatile Butterfly Basics stamp set from Stampin' Up! with the Marker direct to Rubber technique. I love using my Stampin' Write Markers directly on the rubber of the stamp - it is such an easy way to get multiple colours on one image. 

Here is the card: 


My mum has always loved red and it variations. 
I used Crumb Cake as the card base and Whisper White on which to stamp the image. The colours in the image are Rose Red, Pear Pizzazz and Always Artichoke. 
And of course I just had to use a little Gorgeous Grunge in the background. I probably break all the rules when using this stamp as I do not bother mounting it on a block - I simply press it into the ink and stamp with uneven pressure onto the card. This gives me a more grungy look.


The butterfly is cut out of a Gold Foil sheet using the Bold Butterfly Framelits and this has been topped with a bow of Linen thread. Currently the framelits and stamp set are available as a bundle, but this will change with the new Annual Catalogue on June 1. If you want to save a few dollars (15%) then you should consider getting it now


I added a little Venetian Crochet Lace to one side and blended some of the outline colour into the centres using a Blender Pen. Stampin' Up! Classic Inks are perfect for this technique, and as the Markers contain the same ink as the ink pads, you can achieve the same results.

The card is in the post and I hope mum likes it - it is always difficult being so far away on special occasions and a phone call just doesn't seem the same as being there in person. 

Until Next Time

Happy Crafting


If you would like to make a card like this you can order the following products at my on-line store. The stamp sets will be carried over into the new Annual Catalogue (you can see this on June 1) so it is well worth getting them. As always if I can assist you with further information about this card please contact me.

Wednesday, 26 August 2015

Stampin Up Weekly Deals

The Weekly Deals from Stampin Up are a great way to build your supplies at a saving for you.

This weeks deals center around Embossing Folders - I believe to be an essential item for card making. Love my embossing folders! 

You can purchase these products at my on-line store or send me an email and I'll order for you. But remember they are only available for one week from August 26th - September 1st inclusive.


Built for Free Using: My Stampin Blog

Sunday, 26 April 2015

Work of Art and Summer Silhouettes Collage Stamping Card

After owning Summer Silhouettes for quite some time I have only just started to use it, and I now realise how versatile it is as a stamp set.

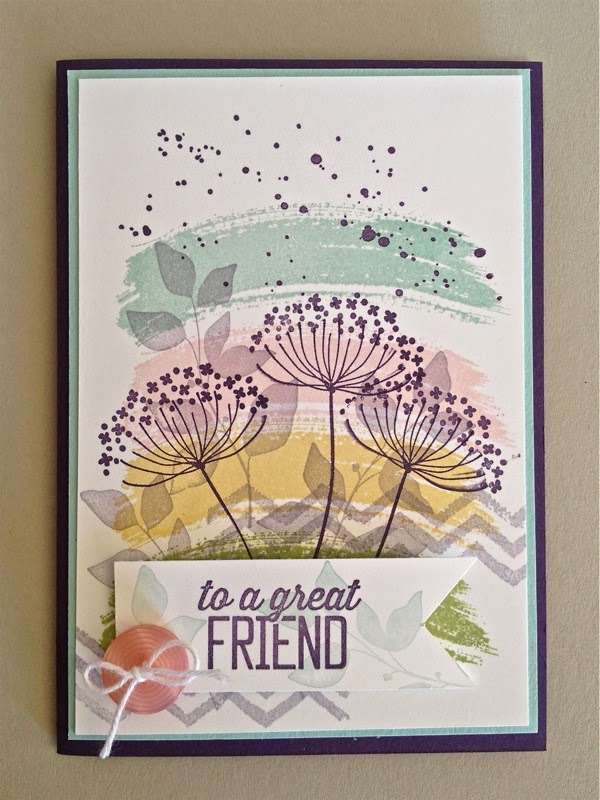
For today's card I have combined it with another favourite stamp set from Stampin' Up! - Work of Art.  And of course I had to add a little bit of Gorgeous Grange to balance out the design. I decided to use the Subtles colour range of Classic Inks for this card and chose Pear Pizzazz, So Saffron, Pink Pirouette and Pool Party for the background. 


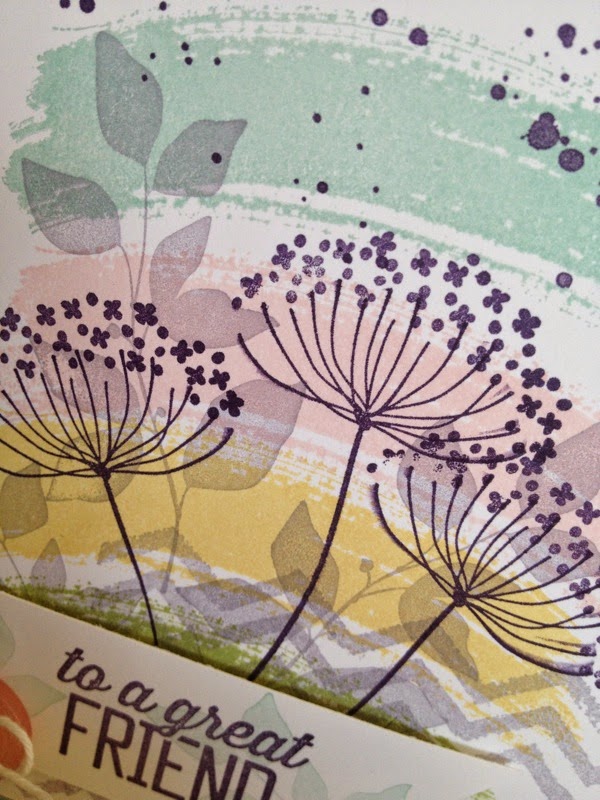
I love a bit of contrast in my cards, but this time I kept with the Subtle colours and opted for contrasting shapes in the background - the zig zag and leaf shapes, rather than contrasting colour. These shapes are stamped in Wisteria Wonder.

Black silhouettes would have been too stark on these soft colours so I stamped the flower silhouettes in Elegant Eggplant and I love the effect. The greeting is also stamped in Elegant Eggplant with soft leaf images that have been "stamped off" in Pool Party. The greeting is raised on Dimensionals and embellished with a button from the Soft Subtles range. Some White Bakers Twine tied into a bow finishes the effect I wanted.

To enhance the colour choices I placed this on a mat of Pool Party card stock then onto an Elegant Eggplant card base.


This was such a fun card to make and my Crafty Tuesday ladies enjoyed it a lot. Collage stamping is one of my many favourite techniques and I think the stamp sets Work of Art, Summer Silhouettes and Gorgeous Grunge combine beautifully.

Thanks for stopping by


Here is a list of Stampin' Up! products used for this card. You can order any of these product from my on-line store or contact me via my demonstrator website me with your requests.


Built for Free Using: My Stampin Blog

Tuesday, 24 March 2015

Aloha Friends.

I'm thrilled to let you all know that I've just earned the Grand Vacation to Hawaii. 

Special thanks to my awesome team for their help and friendship throughout the year.

A holiday in the warmth will be lovely in May - just when it is getting cold here in Canberra. 


Now to find out a few extra things to do over there.
We are planning on going to Hawaii the Big Island a few days before hand as it is our 43rd wedding  anniversary 3 days before the holiday starts and we'd both like to do a bit of exploring around the volcanoes National Park. Should be fun, so I'm hoping all the flights etc can be arranged


Wednesday, 18 February 2015

Adventure Bound Cards for All Occasions

Have you tried the Adventure Bound Designer Series Paper Stack by Stampin' Up! yet? It is a fabulous selection of images that at first glance bring to mind - cards for the men in our lives. 
However, today I have a card using one of the papers from the stack along with one of the images from the Moon Lake stamp set that is suitable for either gender.  Both of these items can be found in the Occasions Catalogue


 The image is stamped in Memento Black and a light touch of colour  (Soft Sky) is added with a blender pen. 


The detail shows some Seam Binding, a Silver Button and White Bakers Twine. Don't you love the visual texture achieved from the Paper Stack? The images are so life-like.
I cut the paper to size and matted it onto Basic Black card. I chose the position of my "window" and used one of the Oval Framelits with the Magnetic Platform and the Big Shot to cut through both layers at the one time. 

A little sponging with black around the opening before raising this above the stamped image by using Dimensionals. 


All the layers were then adhered to Smoky Slate Card.

The Adventure Bound Paper Stack enables you to make gorgeous cards quickly. Give it a try.


Until next time, Happy Stamping!

Here is the list of items used in this project. You can purchase them at my on-line store or simply contact me with your order.


Built for Free Using: My Stampin Blog

Saturday, 14 February 2015

Stars Framelits Simple Christmas Card

Christmas may well be another 313 days away, but it is never too early to start making your own  Christmas Cards. This year I'm trying to create lots of CAS (clean & simple) cards and this is one of the designs from my first Christmas Card Stamp A Stack.


The background of the card is created by sponging Stampin' Up!'s Island Indigo Classic Ink over one of the patterns from the absolutely gorgeous Irresistibly Yours Speciality Designer Series Paper. The paper has an embossed design on one side - this one is diagonal stripes, and all you need to do is sponge colour then buff the page lightly with a tissue or soft paper towel. This will remove any excess ink on the raised pattern - in this case the diagonal lines. 

The stars can be positioned anywhere on the card when using the Stars Framelits and Magnetic Platform with your Big Shot, and this allows for lots of variation in your designs. 

I have rounded the corner edges with the Project Life Corner Punch and raise the Whisper White card front with Stampin' Dimensionals to expose Silver Glimmer Paper underneath.  The Faux Stitching is hand drawn with the Island Indigo Stampin' Write Marker 

I love this design and look forward to making more of these in a wide range of different colours.

The Irresistibly Yours DSP is one of our Sale A Bration (SAB) free gifts. If you would like some, you can only get it with a $90 order. Then it is free! There are lots of other items to choose from so don't miss the opportunity - browse the SAB catalogue and  contact me or place your order on-line.

Don't forget to check out the Weekly Deals in the right hand side bar for some more great bargains.


Best wishes for happy crafting


Built for Free Using: My Stampin Blog

Tuesday, 13 January 2015

Stampin' Up! 2015 Occasions Catalogue Launch

A new catalogue is always exciting and this one from Stampin' Up! certainly does not disappoint. It is filled with gorgeous stamps, accessories and loads of ideas. To celebrate the launch of this catalogue, I held an event for some of my customers. 

It was a pretty casual event with one side of the work tables covered in samples and new products, while the other side had work stations for everyone to try out a couple of select products.


One of the first projects you see is the gorgeous flower posie on the front cover of the catalogue. I made one up to decorate the table and I have to say - it is stunning. It took me a while to get the hang of it, but now I'm looking forward to making a few more. Kits are such a great idea for gifts and lots of fun for classes.

There are stamp sets galore in this Stampin' Up! Occasions Catalogue, and they come in a variety of wood mount, clear mount or photopolymer, giving you lots of options and price ranges. 

Look out also for Bundles - you'll save 15% on them, while getting accessories that help speed up the crafting process. 


Here are just a few of the stamp sets that were on display! They generated lots of interest and ideas for using them were shared around. 


This Occasions Catalogue comes with a bonus as it is part of Sale A Bration. 
Stampin' Up! has this great promotion at the beginning of each year and everyone can earn free products. All you have to do is spend $90 on product from any of the current catalogues, the Clearance Rack and the Weekly Deals and you can choose one item from the Sale A Bration Catalogue

Take a look at the catalogues on-line and if you would like a hard copy, contact me and I'll send one to you. If you would like to place an order you can fill your shopping basket here!

The order will be posted directly to you. You can pay securely with credit card and shop from the comfort of your home.

Enjoy the catalogue and stay tuned for some fun samples


Wednesday, 3 December 2014

Visions of Santa

The Stampin' Up! stamp set: Visions of Santa is just so cute - I love it. I love the humour and the cute images. At a recent Christmas Tag making event I held we made a couple of cute and very quick little tags using some of the images from this set. 


The tags are made by cutting 2 inch strips of Real Red card and 1 and 5/8 of the red patterned paper that comes from the Santa and Co. Designer Series Paper. Both of these items an be found in the Holiday Catalogue on page 29.

After adhering them together, I used the Angled Tag Topper Punch to shape the top and punch the hole for the gold cord. The Santa images are stamped onto Whisper White card using Memento Black ink, and coloured with the gorgeous new alcohol markers by Stampin' Up! - Blendabilities. I've just added a cute gold button from the Gold Basic Metal Buttons (p. 41 of the Holiday Catalogue) and a couple of flags for the greetings.

When you combine these tags with a box made out of the Santa & Co. DSP, you have a beautifully presented gift. As one of the stamps in this set says: 
"Tis the season to be fancy!"

Enjoy!


Monday, 1 December 2014

Stampin' Up! Stall at Old Bus Depot Markets

I know it's been ages since my last post but I have just been so busy with classes, parties, getting items ready for markets every Sunday, interstate travel to Gold Coast and Darwin, and babysitting 2 little ones 2 days a week. My days just fly on by... I'm not complaining, I just wish there were more hours in the day and that I was 25 years younger!

Very popular items at the markets this year have been these snowflake ornaments that are made out of Stampin' Up! Whisper White card, some of Stampin' Up! retired stamps and framelits and the gorgeous Dazzling Diamonds.


They take a lot of cutting out strips of white card stock, but they go together pretty easily and are fun to try all different sizes. I use the Tombow glue and some bull dog clips to hold the strips once they are curved, and hot glue to attach them to the centre round. Then I use a 2 way glue pen to draw around the edges of each piece of paper and sprinkle Dazzling Diamonds over the top. 

I am really enjoying these ornaments and hope you do too.

Until next time


Thursday, 16 January 2014

Cute Monster Valentines From Stampin' Up!

Valentines Day is fast approaching and to help you prepare a little treat for all those special people in your life, Stampin' Up!® has the cutest Monster Valentines  in a simple to construct, gorgeous kit.

Kits save time and are very cost effective - this kit is delightful - you can choose either girl Valentines or boy Valentines or you can choose both.


I've added a couple of Hershey's chocolates to each one - there is a strip of adhesive behind where the arms fold over, so they are held in place. 

At just $9.95 for 18 Monsters - these are a bargain and the kids will enjoy creating something for their friends. All the extra bits - eyes and hearts are included in the pack, and the back has a space to write a message. 

The "Whole Lot of Love" Promotion ends on January 27 and you will not be able to purchase all the exclusive sets after that date. 

All items available until January 27, 2014.
so place your order on-line now

Here is some more information about the exclusive items available with this promotion


You can see a larger version of  these offerings and place your order on-line via my Demonstrator Business Website or feel free to contact me with any questions you may have.

Join in the fun and show all the special people in your life, that you care.

Until next time

Stay Crafty


Monday, 16 September 2013

Flip Card - Travel Theme - Stampin' Up Papers and Stamps

These flip cards are so much fun to make and whilst they are quite easy, it really helps to have the "Window Frames Collection Framelits" from Stampin' Up! Actually any set of framelits that are symmetrical will suffice - I just like this shape for the variety of inner shapes that can be created. 


I have used 3 different sized Window Frames Framelits
Soho Subway Designer Series Paper
Gorgeous Grunge Stamp Set - plus some other stamps that have retired.
Soft Suede and Very Vanilla Card Stock with a detail of Pacific Point to cover up an "oopsy" on the RHS.
I really like the technique of stamping over patterned paper - the results can be amazing.

Hope you like the card

Until Next Time

Stay Crafty