Showing posts with label Watercolour. Show all posts

Wednesday, 8 July 2020

Freshly Brewed Projects Blog Hop - One Stamp Three Ways

Hello, and welcome to another Freshly Brewed Projects Blog Hop.
This week we have the task of sharing how we can use one stamp in 3 different ways.
I love colouring so thought I'd show you 3 ways of colouring a fun stamp set named "From All Of Us". The creatures in this set are very cute and have an almost cartoon character so this gives scope to interpret and colour any way you wish.

The first card is uses a water colour technique with Stampin' Up! classic inks and an Aqua Painter on Fluid 100 Watercolor Paper. I love the speed and watery effects that can be obtained with this technique, and it never bothers me that sometimes I go over the lines or the colours run a little.


You can see the  uninhibited colouring in the detail photo, but it is the effects in the background that I enjoy the most.
 

The second technique I used is colouring with Stampin' Write Markers. This is a much more controlled technique that is suitable for younger children. As you can see I chose just a couple of Neutral colours, focusing on Basic Black, Smoky Slate and Basic Gray. I used one of the beautifully texture inspired pattern papers from the In Good Taste Paper Stack as the background.


It is more difficult to get a flat colour using the Markers, but I find if you colour in one direction (horizontally) first then go over the same area colouring the other direction (vertically) then the area achieves a nearly flat effect. I did want this one to be more graphic and 2-D . The little red heart adds a pop of colour to brighten up the card. 


The final card took the most time and is coloured with Stampin' Blends. The bright colours work well for this card which is suitable for a child's birthday. 
Remember to use Memento ink when colouring with the alcohol Blends. This will stop the outline from smudging.


I've stamped a branch image and cut it out to thread through the monkey's hands. This adds a little texture to the card. I don't usually mat images on an angle but this one looked so much better crooked! 


And here are the 3 cards together showing you how different the same stamp can look depending on how you treat it and what technique you employ.


There are too many products used  to list them all, so if you want further information on any of the cards, just make a comment and I'll get back to you. 
You can shop for the stamp set # 152641 and all the other products in my On-line store

It is now time to hop along to the next blog - simply follow the links below: You are with Ann Craig now so just select the name at the top of the list - Libby Dyson - to go to the next blog.

·      Libby Dyson

·      Jessie Holton

·      Narelle Fasulo

·      Debbie Yeomans

·      Ann Craig


Best Wishes and Happy Crafting,


Sunday, 22 March 2020

Ornate Garden Suite Early Release From Stampin' Up!

Do you love a preview from the new Stampin' Up! catalogue?

That is what I have for you today. You can purchase the entire Ornate Garden Suite or you can purchase individual elements from it. 
The Ornate Garden suite will be featured in the  2020-2021 Annual Catalogue, but you will be able to purchase it starting April 1, 2020.

Here are some of the beautiful images and delightful detailed dies that form part of the suite. Purchasing a bundle saves you 10%.

This is the Ornate Thanks stamp set with coordinating Ornate Border Dies. The stamp set is perfect for using as a greeting, but also makes a lovely background.


If you are looking for images to colour then the images from the Ornate Style stamp set are perfect for water colour, Blends or water colour pencils. And the Ornate Layers Dies will give you beautifully detailed borders to frame your floral images. Combine them with some text from the Ornate Thanks stamp set for a professional finish.

A suite usually contains embellishments that enhance and coordinate with the stamps and dies and the Ornate Garden Suite does not disappoint.

Beautiful Specialty Designer Series papers.

Ribbons, Gems and a 3D Embossing Folder.
Here is a quick card I made using the Specialty Designer Series Paper, gold foil frame from the Ornate Layers Dies - and it cuts beautifully! - and a poppy image from the Painted Poppies stamp set. (You'll find that in the Mini Catalogue)


As a Demonstrator I have the advantage of pre-ordering these products, so I already have them in my possession. If you would like to take advantage of the Sale-A-Bration special offer to Join Stampin Up, see all the benefits here.
This offer only lasts until March 31. If you'd like to discuss your options - give me a call and I'll answer any questions you might have. 


Friday, 15 July 2016

Best Birds Watercolor Cards using Stampin' Up!® Supplies

This week I have focused on another of the new bundles from Stampin' Up! The Best Birds stamp set coordinating framelits and I had already pictured what I wanted to do with this set. 

As usual, with my eclectic style I had to use some complimentary stamps and for this set of cards I chose the versatile Water color Wash large background stamp.

Here is the card


This is the first of 8 cards I made; all slightly different but staying within a similar theme. You can see that I've used the lovely crosshatched stamp over the Stampin' Up! Watercolor Wash stamp and then dry embossed with a now retired Folder.

See how beautifully the framelits cut out the birds and branch shapes?


Lots of slight variation in colour combinations and arrangements of the birds and branches, but I kept the cards similar by stamping everything in Soft Suede and limiting the water colouring to Blushing Bride, So Saffron, Old Olive and Soft Suede throughout. 

I sponged the edges of the card with Soft Suede to achieve the look I wanted. And I used both the Blender Pen and an Aqua Painter for my colouring.


If you would like to create with this stamp set you can order it on-line via my Stampin' Up!® store
or contact me via my Demonstrator Business Website

As an added incentive for the month of July you will receive a Stampin' Up! Bonus Coupon to spend in August. The coupon is valued at $9 for each $90 you spend. There is no limit and there is a fabulous new Bundle coming in August that will only be available throughout August. So stock up on those essentials now and you will have free dollars to redeem in August. You will need to provide an email address to receive your voucher. Contact me if you would like further information.

Until Next Time

Happy Crafting


Thursday, 10 December 2015

Water Colour Partridge Christmas Card

... "And a partridge in a pear tree" - such a lovely line from a great song that perfectly describes this Christmas card I made recently.

I purchased this Stampin' Up! stamp set when it first came out  - I love the illustration and could see it would make a quick card for Christmas. My idea was to heat emboss the image and then water colour select areas to highlight the partridge and the pears.


The detail shows the colouring technique, and the little gold glittery highlights are made with the Fine Tip Glue Pen and the Stampin' up! Gold Glitter.
I used an Aqua Painter and classic inks. Colours are Crushed Curry, Tangering Tango, Island Indigo and Rich Razzleberry.

A couple of hints:
Make sure you use your embossing buddy on the white card stock before embossing with black.
Always start with the lightest colour when using water colour in confines spaces like this.
Mat and frame your card in colours that coordinate with the image.

Until next time

Happy Stamping

Friday, 24 April 2015

Summer Silhouettes Watercolour Card

After the great success of the Hawaii Achievers Blog Hop, I'm inspired to make more cards using lots of different techniques. If you are already tired of this nasty weather on the east coast of Australia, take a look at the tropical inspiration on the blog hop.

Today's card is created using Stampin' Up! re-inkers dropped onto wet watercolour paper then stamped with Summer Silhouettes stamp set when dry.


I used concentrated Pink Pirouette and Wisteria Wonder inks dropped onto a wet surface on this card and I love how you never quite know how the background will turn out. Wet on wet always creates a certain amount of serendipity and gives you a great base to position the stamped image without pre-planing too much.

To enhance the black stamped image, I placed the card on a black mat, then a white mat and finally a Wisteria Wonder card base. 

Because water colour paper has such a lovely texture, the stamped images do not always come out as crisp as they do on Stampin Up! Whisper White card. That doesn't worry me at all - in fact I really like a more natural  effect.


I used Memento Jet Black for the images and was careful to dry the water colour paper before stamping onto it. (I used my heat tool on a low setting, heating both from the front and back of the paper) 

I hope you enjoy this card and will give water colouring on water colour paper a try. It is important to use good quality paper, and Stampin Up! provides w c paper of lovely quality.

You will find below a list of the products used. You are welcome to use my on-line shop to order any of these products.


Built for Free Using: My Stampin Blog

Friday, 6 February 2015

Bokeh and Stampin' Up! = Very Cool Results

Hello, hello.

Are you in the mood for a little serendipity? Then you must give the Bokeh technique a try using some of your Stampin' Up! supplies.

What is Bokeh? And how do we translate that to our stamps and inks?

In photography, bokeh (Originally /ˈboÊŠkÉ›/, /ˈboÊŠkeɪ/ BOH-kay — also sometimes pronounced as /ˈboÊŠkÉ™/ BOH-kÉ™, Japanese: [boke]) is the aesthetic quality of the blur produced in the out-of-focus parts of an image produced by a lens. Bokeh has been defined as "the way the lens renders out-of-focus points of light".

Card created by Suzan Visentin
 At our team meeting this month we focused on experimenting with the Bokeh technique. It was a first for all of us and the results were quite diverse. See the circles of white on the background - they are created with Stampin' Up! Whisper White ink sponged through a mask cut with different sized circles. I used Window sheet and the Circles Framelits  to make the masks. Don't try to use your punches as they don't cut window sheet very well!!!

Card created by Patricia Arentz


To create the background we spritzed some water colour paper with water, then dropped 2 - 4 colours of re-inker onto the paper. Spritz again to disperse the colour more. If the colour is too intense for your liking, simply blot with some paper towel, then dry with the Heat Tool.
Load a sponge with Whisper White, and starting with the largest circle, sponge through the mask moving it randomly over the background. Next sponge through the next smallest circle and continue until your background looks like it is spotted with light. Hasten drying by using the heat tool, because you just will not be able to wait to continue with your creation! You will start to see some very interesting effects now. 

Card created by Ann Craig

The 3 samples above show the varying degrees of intensity that you are able to choose when adding the white ink. We used the gorgeous Butterfly Basics stamp set and Framelits dies which we bought as a bundle and saved some $'s. The stamps are gorgeous and so adaptable.

When the background is thoroughly dry you can add stamps, die cuts, embellishments or ribbons to complete a unique card. 

Card created by Ceshton Hanns

Contact me if you would like further information on this technique. We will be doing a class on this method of creating in my Techniques Class some time later in the year. You are welcome to join the class.

Here is a list of the products used:

Built for Free Using: My Stampin Blog


You can order these products at my On-line Shop 
Or contact me for assistance.


Monday, 21 July 2014

Getting Ready for the Canberra Craft Fair

hello there!

What are you up to today? I've been very busy creating with some of my new stamps from the newly released Stampin' Up! Annual Catalogue. As I have lots of cards and kits to make for a project I'm doing for the Canberra Craft & Quilt Fair in August, I decided to try a simple yet effective card  as one of the samples people will receive in their showbags.

We are trying something new at our Stampin' Up! booth this year and hope it will be a success.

SHOW BAGS

We will have 3 different types of bag:
Birthday Theme
Christmas Theme
General Theme

Each bag will be filled with over $40.00 of product, kits  and samples pertaining to the theme, and will cost just $20.00, so come and visit us at the Craft Fair.


The photos is a sneak peek of just one of the cards using new products from the Stampin' Up! Annual Catalogue. If you want a catalogue you might be able to get one free with your first Show Bag purchase! Come to visit us at our booth for all sorts of Show time specials.

See you there,


Friday, 20 June 2014

Water Colour & Life In The Forest

I've been using lots of the very convenient Note Cards & Envelopes from Stampin' Up! recently and find them wonderful for creating quick sets of cards. At one of my recent classes we used a stamp from the "Happy Watercolor" set combined with the cute little animal images from "Life In the Forest". Both these sets are in the Occasions Catalogue that will finish on June 30, 2014, so if you don't have them yet you can order them at my online store.

We made a set of 6 cards - I will show just a couple of them here.


Stamping the colour shape first, negated the need to colour the image and I love the simplicity of this effect, not to mention the speed of completing the cards.


The cards were finished off with the "Just Saying" stamp set from Stampin' Up! and that can be purchased  with the Word Bubbles Framelits Dies as a bundle. Did you know that Stampin' Up! bundles some of the coordinating products and then saves you 15% when you purchse them as a bundle. Just keep an eye out in all the catalogues for the Bundle & Save  signs. You can be sure that the items will coordinate beautifully and you will save 15% from the purchase price.


I raised the word bubbles on dimensionals, adding some texture to the card. 
If you would like any of these products just go to my on-line store and the items will be posted directly to you. This is a safe and convenient way to shop for Stampin' Up! products and if you want assistance with any techniques or product information you can contact me via my Demonstrator Business Website

Until Next Time

Stay Crafty


Wednesday, 14 November 2012

More Poppies from Stampin' Up

I can't believe how fast this last month has flown by. It could be that I've been frantically preparing for my presentation at the Stampin' Up!® Heartfelt training event in Sydney this past weekend or it could be that as I get older life just passes more quickly. Either way it is well past time to show a few more of the Poppies cards that I promised nearly a month ago.


As many of you know, I love to watercolour and my favourite tool for this is the AQUA PAINTER. These poppies are created using Stampin'Up! Classic ink colours MARINA MIST, DAFFODIL DELIGHT  and CAJUN CRAZE. 


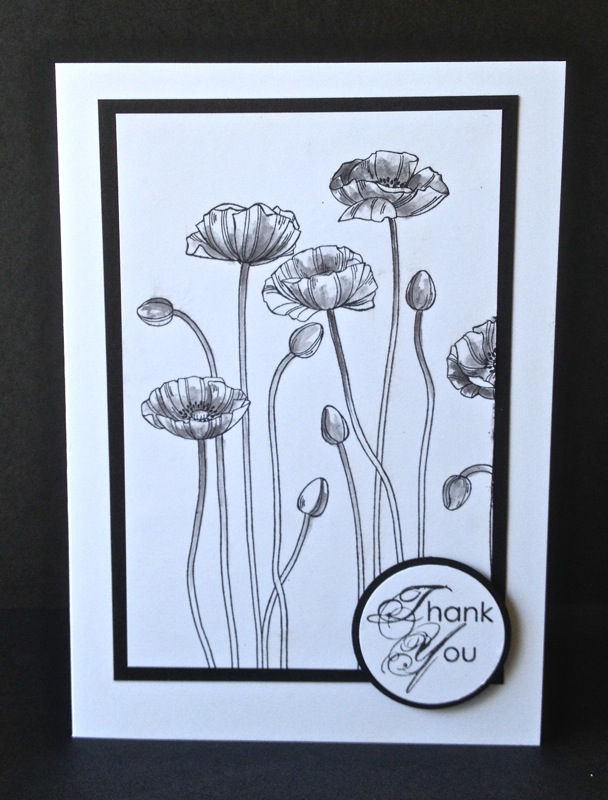
This Black and White version was a hit with all the girls at the class and was probably the easiest of all to make. Stamp a Basic Black outline of the image and use the Aqua Painter and ink to shade areas.


Another simple version - this time using Marina Mist again. and creating some background interest with the Marina Mist Stampin' Write Marker and the Spritzer Tool.


Until Next Time

Stay Crafty and Stay Happy


Tuesday, 26 April 2011

Manhattan Flower and other Embossing Folders

I'm not sure you know how much I love my Big Shot from Stampin' Up! but let me tell you it has revolutionized my card making.

I love texture and pattern and the Big Shot makes all of that so easy.

Today I have a couple of cards I made from the one sketch at a recent Stamp A Stack (Cards for mothers) I held in my stamping studio. 

I concentrated on showcasing just how versatile card making can be when using the Big Shot, and of course we added in a couple of other techniques at the same time. Sometimes I make the cards quite time-consuming for my regulars, other times they are quick and simple - mostly it depends on the techniques used.


The additional techniques used for these cards are water-colouring with an Aqua Painter and Classic Inks, and Sponging with a Stampin' Sponge and classic ink.  This is one of the most relaxing techniques for me as I find it is just like the colouring-in we did as children. The embossed outlines of the Manhattan Flower Embossing Folder create subtle outlines and any little slips can be covered over with a bit of sponging (see detail photo)


 I added some of my favourite trimmings from Stampin' Up! - crochet trim and linen thread, and completed the card with some Basic Pearls highlights. 


 Here is another version. Same sketch layout, same colours (Whisper White and Old Olive) but different ribbon and embellishments. This time I used 1.6 cm Very Vanilla Grosgrain Ribbon and one of the bronze coloured brads from the Antique Brads range. I couldn't go past adding some Linen Thread. 
The thread actually has an important function as it holds the "faux bow" in place before adding the brad.


 The Scallop Trim Border is perfect for creating interest at the base of the card.


And the lovely Petals A Plenty embossing folder creates the perfect backdrop for the larger Manhattan Flowers. Some nice little Antique Brass brads embellish the top corner.

I've actually created a whole series of these cards - each one slightly different, and can see myself continuing to make similar ones in a wide variety of colours.

I hope you've enjoyed seeing these and would encourage you all to give water-colouring a try. It is very relaxing and the only thing you need to watch out for is not to let your card stock get too wet. It will warp, and that's not a pretty sight!

TIP: When adding colour to Whisper White card stock, ensure your Aqua painter is not too wet. 
Squint at the flower and envisage what areas would be darker.
Start painting next to the raised outline and apply a small amount of colour.

YOU CAN ALWAYS ADD MORE but IT IS SO HARD TO REMOVE COLOUR. 

Ensure you leave "white spaces" - this trick gives your image life  and dimension.

So give it a try,

and until next time

Stay Crafty!


If you would like to attend any of my regular classes you can contact me via my Demonstrator Business Website 

I have regular Stamp A Stack classes the 3rd Monday of each month.
I have regular Christmas Card Classes the 1st Wednesday of every month