Showing posts with label French Foliage. Show all posts

Friday, 7 June 2013

Fun With The Stampin' Spritzer and Re-Inkers

It's been too long since my last post, and I've missed you all. Sadly life gets in the way sometimes.
But I'm back with a fun project that will stretch your creativity and be lots of fun in the process.

FUN WITH THE STAMPIN' UP!® STAMPIN' SPRITZER. 
These little beauties are just $4.95 for 2 and you'll want to get one for each colour re-inker that you own.

Here is the project I did in this weeks TECHNIQUE class. It is a Gate-fold card decorated with the spritzed and stamped panels.


I've used Basic Black card as the base, but let me tell you about the process of creating the panels. 
  1. We started with an A4 sheet of Whisper White card and chose 3-4 colours of re-inker to make up into the sprays.  
  2. You simply pour Isocol (alcohol) into the bottle and add the number of drops of re-inker that will give the desired strength of colour. 
  3. Start with 5 - 10 drops and test the colour on your white card. If you require a darker effect simply add more ink a few drops at a time. 
  4. Repeat this process with each colour so that all your spritzers are ready to use.
  5. Start with your lightest colour and spray randomly over the white card. 
  6. Repeat with each of your colour choices -HINT- the darker the colour the less you spray on!
  7. Remember the colours will lighten a little as they dry.
  8. Choose a stamp set that will compliment the colour range you used and stamp images using the same colour inks.
  9. Make a negative mask that will be the size of the panels you need for each side of the card and move it around the page to find the best sections. (To do this you cut out the shape and retain the outside that acts as a frame that you can move over the panel and see what will be included in your selection)
  10. Trace inside the mask. Cut the panels out and adhere them to the black card.
  11. I needed to sponge the edges of each panel to "seat" it onto the card. (just because....)
  12. Use framelits to create any shape closer and cut out 1 each of the black and decorated shapes.
 You can see the build up of layers and the delicate spritzing in these photos.

Collage stamping is one of my favourite techniques and it just became more interesting by incorporating this technique.

I've used my all time favourite stamp set: FRENCH FOLIAGE and I'm devastated that it is being retired from our catalogue. So if you would like to own it  you'll need to purchase it in the next 3 weeks. You can do this at my on-line store and as a bonus your order will be shipped directly to your door. While you are there have a look at the other promotional specials that we have for you at Stampin' Up! and don't forget if you'd like to discover My Digital Studio, you can download a free trial version.

I hope each of you will roll up your sleeves, prepare to get a bit messy and have loads of fun with this project.

Until Next Time

Stay Crafty,


Friday, 3 May 2013

ATC's - Delightful Little Pieces of Art Using Stampin Up Products

Let myself go a little last night and used some retired Stampin' Up!® stamps to create some ATC's for a swap. The topic is "Things With Wings" and I have some gorgeous, very old stamps that just flashed into my mind. 

ATC's are tiny little swap cards - little bits of art that crafters swap and collect. 
They measure 3 and 1/2 x 2 and 1/2 inches, so are quick to create. 

I wanted to create something colourful, with a bit of texture and drama, so envisaged the colour scheme and hoped that I'd got it right as I was making 9 of these little fellas. 
Here is the finished product using heat embossing, sponging, stampin' off and hand colouring techniques. 


The colours are a little faded in this picture, but you get the idea. 

After stamping the butterfly image with Versa Mark and heat embossing with black embossing powder, I built up layers of sponged colour (starting with the lightest - yellow). Then I stamped the leaves from French Foliage over the top around the perimeter of the card. Finally I added some Melon Mambo with a Stampin Write Marker and blended it a little with an Aqua Painter.

So much fun  - my fingers were covered in ink, but it was nice to create something just for the sake of it.

Once again I reverted to using the most versatile stamp set I own - French Foliage by Stampin' Up! You can find it on p. 86 of the Annual Catalogue and if you see anything else in there you want you can place an on-line order via my Demonstrator website. All you need to do is select the SHOP NOW  button in the top right hand corner and your products will be sent to your doorstep. 
24/7 shopping is handy and if you are like me you'll enjoy the convenience of shopping when you feel like it.

Until Next Time,

Stay Crafty!


Tuesday, 9 April 2013

French Foliage Birthday Collage

I felt very humble today when one of my new customers requested a class with me as a special treat for her birthday! 
She is learning techniques so quickly, and I loved the one-on-one class where we could discuss the reasons behind various aspects of techniques, colour choices and card design, all while we were stamping and having fun.

I love to challenge my customers to use unusual colour combinations and today we worked in Not Quite Navy, Perfect Plum and River Rock. They are gorgeous together (I think) and the slight neutrals achieved when overlapping helps to create a vintage effect. 

As many of you know I love the Stampin' Up!® stamp set - FRENCH FOLIAGE.  It is just so versatile and after seeing a gorgeous card by one of my fellow demonstrators - Leonie Schroeder
found myself keen to explore more options with this set. 

The first card we did is a Birthday card.

I've added paper piercing, sponging and stampin' off to give a variety of tones of the one colour. Love how this creates the illusion of depth.


I used a BLENDER PEN  to colour in the "i" in the greeting, and added a touch of whimsy by stamping the bee from NATURE WALK  by Stampin' Up!
I don't often stamp the inside of my cards, but we were both enjoying this style of stamping so much that it seemed the right thing to do. Also as the base card is quite dark, it is easier to write a greeting on the lighter background.
This is what I came up with...


I wanted to try out another Stampin' Up! stamp set that I purchased recently - COUNTRYSIDE. 
I thought this set would be wonderful for cards for the boys, but I love the sketchy images - just because I do!
I  wanted my "birthday girl" to experience other shapes within the main shape so decided to use a circle as the stamping base of the next card. It almost feels like I'm peeping through a looking glass!


The details of faux stitching and paper piercing, textured embossing folders, collage stamping, sponging and stamping all show up in this close-up shot. You can also see how I used a BLENDER PEN to drag some of the printed truck outline, around the image to create slight shadows on the vehicle.
And here's the complete, or almost complete card. I'm not sure whether to add a greeting on the front - what do you think?


I hope you like the cards - we had so much fun making them and the time just flew by.

Until Next Time,

Stay Crafty!


Thursday, 28 February 2013

A Sentimental Tag

I'm really enjoying the Feeling Sentimental stamp set from Stampin' Up's exclusive range of 
Sale-A-Bration  exclusive free products.

I took the next project a little further and concentrated on creating a variety of textures that grew as the work evolved. I did have a plan in my head, but as usual, that plan took different directions as the Tag evolved. I love working that way. It is very satisfying not to be restricted by parameters, and I think allows the creative process to really flow. 

Here are a couple of detail shots of parts of the tag.


 My colour range is yellow, craft, artichoke and early espresso on vanilla card.
For the image I used the Rock 'n Roll technique: firstly inking the image with Artichoke then rolling the edges in Early Espresso. This makes such an interesting two colour image and I love the little hint of serendipity where one doesn't quite know how things will work out. I used images from French Foliage to compliment the main image that is another stamp from the Feeling Sentimental stamp set. 


 A variety of textures were created using the Big Shot and the Stampin' Up Embossing Folders: Chevron and Stripes. These areas were over stamped with images from French Foliage and sponged with Artichoke and Espresso inks.
I used Craft, Yellow and Artichoke Seam Binding with some Linen Thread to create the tie at the top, and a little scrap of Crochet Trim as a detail and added texture on the tag.


This was really fun to make and I'd love to try it in a variety of colour ranges.
I do hope you enjoy these projects and that you will give them a try. 

I think this project fits the following challenges:
Addicted To Stamps challenge - must include stamping
Stampavie and More - Tag It challenge 188
Simon Says Stamp - Anything Goes

Until Next Time

Stay Crafty


Thursday, 31 January 2013

Altered Box

I've always adored working in 3-D and have to admit a slight penchant for the Vintage influence. This project satisfies both of my likes!

I found these "books" in one of the local cheapie stores and decided they would be perfect for altering. I had just the right retired Designer Series Paper from Stampin' Up! in my stash and ended up with this result.


I wanted to create a nice box to keep some special cards and envelopes in, and while the pattern on the original box did not appeal to me, the colouring in the spine did. I was also experimenting with ways of using Stampin' Up's Labels Collection Framelits - so have used them to frame the title area.
Some Crochet Trim and Linen Thread tied around the front cover, complete the effect.

The inside of the box.

The really fun part was creating the Title area.


I used Stampin' Up's Apothecary Art Stamp Set and hand coloured it with Classic Inks and an Aqua Painter. This was then cut out with a Labels Framelit. I stamped the word "CARDS" using the Lovely Letters Alphabet from Stampin' Up! then crushed the card stock prior to sponging it. I love this effect. 

The outer frame is embossed with the Square Lattice Folder, then de-bossed with another size of the Labels Collection Framelit. I used Brushed Gold card stock as the base for the frame, then sponged the texture with Soft Suede and Early Espresso Ink.


Can you see what I've used to "age" the stamped area.  My favourite useful stamp set from Stampin' Up!  - French Foliage.  Just love those little splotches for all sorts of projects.

That's all for today,

Until Next time
Stay Crafty! 


Wednesday, 10 October 2012

Spring And Stampin' Up Colour

Spring is such a happy time of the year - colours everywhere and I always look to see what matches my Stampin' Up! inks.The gardens are full of colour, trees bursting into life with new leaves and blossoms and here in Canberra we host the premier Flower show in Australia - Floriade. I went along to Night Fest this year and enjoyed some dinner with my husband and the fantastic night lights. Here are some photos.


 Of course during the day the colours are brighter and lighter and this inspired me to create the decorations on a little 2 pocket bag I had  waiting to be completed.

 I used retired Stampin' Up! paper for the Double Pocket Bag and combined it with Certainly Celery, So Saffron and Whisper White for the square motif and doily. The doily is made with the new DELICATE DOILIES SIZZLITS L die that you can find on p. 191 of the Annual Catalogue.


I made the large flower using  So Saffron card stock and the 6 cm SCALLOP CIRCLE PUNCH  from Stampin' Up! I love the flowers that can be made with this punch - they look quite like Camelias. I dusted the edges with TANGERINE TANGO  ink and a sponge.


The leaves are stamped using my favourite stamp set, FRENCH FOLIAGE, then cut by hand, folded, sponged and attached with glue dots. I keep coming back to this set to help with embellishments and to add final details to other projects. Cards and Scrap Pages all benefit from me owning this one. 

If you'd like further information on this project please contact me


Until then

Stay Crafty and Stay Happy


Saturday, 31 March 2012

Top Note Die and Autumn Winter Mini Products

Today I want to show you a card I designed for a small group of friends who gathered for a relaxing night of stamping. 

I based the card on the Paper Players Sketch challenge # 88


I am also entering this card in the following Challenge

Fashionable Stamping Challenge #18  Spring is in The air

Because my friends wanted to do an easel card using the Top Note die, I had to think a little about these elements and decided to use the sketch in 2 parts on the two different surfaces. I'm happy with the result, and had lots of fun using some of the new products from the Autumn - Winter Mini catalogue that will be released tomorrow.


The products used are all Stampin' Up!® and include:
Top Note Bigz die and Big Shot
Perfect Pennants Bigz L die
Stripes Embossing folder
Square Lattice Embossing folder
Beautiful Wings Embosslits die
Little Leaves  Sizzlits die
Heart to Heart punch
4.4 cm Scallop Circle punch
Dotted Scallop Ribbon Border punch
Scallop Edge Border Punch
Basic Jewels - Pearls
Confetti White Card Stock
Vellum Card
Frost White shimmer Paint (made into mist)
French Foliage Stamp Set
Perfectly Penned  Stamp Set
Soft Suede Classic Ink
Pool Party Classic Ink
Pool Party Seam Binding
Attic Boutique Designer Series Paper

What a list! It's just so nice that all these products co-ordinate so well.


This detail shows the interplay of shape and textures. It is so much fun adding dimension to a card. I've used the circular motif from the Perfect Pennants die as the basis for the main focus of the card, then built on it with punching a scalloped circle of DSP. The flower is also made from 4 scallop circles that have been distressed and split, sponged and spritzed.


I love the Perfectly Penned stamp set and when it is stamped on vellum it allows the collage stamping underneath to show through. To achieve the effect under the greeting I first stamped the verse stamp from French Foliage at various angles across the page. Pool Party ink was used. Then I used Soft Suede for stamping the leaves and "splotches". I find this such a useful little stamp for adding "Vintage" to my cards. 

The Striped Embossing folder was inked with Soft Suede prior to embossing then a few Pool Party highlights were sponged on.


And we all love Seam Binding - it is so soft and pliable and can be dyed any colour - you only need a re-inker.  The Pool Party Seam Binding comes already dyed and is a beautiful colour to compliment many of the neutrals.  I've simply applied a line of Snail Adhesive and randomly folded the Seam Binding across the Top Note Die.


Hope you enjoy the card,

Until Next time 

Stay Crafty!


Wednesday, 29 February 2012

Field Flowers For Paper Players Challenge

I promised myself I would enter more creative challenges this year, so today I created this card using the "Field Flowers" stamp set from Stampin' Up!

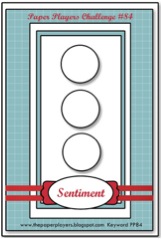
 I followed the sketch from Paper Players Challenge #84


and combined it with the colour challenge for Colour Q # 126


The colour combination of Daffodil Delight, Lucky Limeade, Pumpkin Pie and Early Espresso had me stumped for a little while, especially as I wanted to finally ink up this beautiful stamp set. It  dawned on me that I could create some very interesting neutrals by combining some of these colours without totally  loosing the integrity of the colours.

This is what I came up with. I love how the colours "glow".


After struggling with these elements to fit with my vision, I'm  reasonably happy with the outcome. 

There are lots of techniques used including water colouring with an Aqua Painter, double stamping, stamping off, fussy cutting, spritzing, dry embossing and sponging. I managed to get the flowers looking different even though I used the same stamp. The lowest flower is cut out and raised on dimensionals.

The "white" background is dry embossed using the "Stripes" embossing folder from Stampin' Up!
It has been pre-inked with Pumpkin Pie and Lucky Limeade classic inks.

Some of the detail photos show these techniques more clearly


Don't you just love the "Postage Stamp" punch? Team it with the 1 inch square punch and the possibilities are endless.

I blind stitched around the edge of the top piece of card using my sewing machine then used Linen Thread to sew a cross at the top Left hand corner. Linen Thread is also used to ground the sentiment.

 Here you can see me reverting to my favourite "Collage"style  where I've stamped multiple layers and used a variety of stamps from 2 stamp sets: - "French Foliage" and  "Field Flowers". 

Both are available in the current Stampin' Up!®  Idea Book And Catalogue.


I hope you get some inspiration from this card. I really enjoyed playing around with techniques to create something a little different.

Thanks for visiting and 

Until Next Time

Stay Crafty


.......and late mail makes me one happy stamper. This card was chosen as a Colour Queen Courtier in the Colour queen Challenge #126. Thanks girls!