Showing posts with label Male Cards. Show all posts

Sunday, 8 March 2020

Sale A Bration Just Got Better

Yes that's right! - it's time to add more products to the Stampin' Up! Sale A Bration free offerings.
Starting March 3 you can receive more free products with qualifying orders.

https://anncraig.stampinup.net/special

There are some beautiful new papers and stamp sets.
Sale A Bration is the perfect time to HOST A WORKSHOP. 
With a $90 order you can get these stunning 30 x 30 cm papers FREE.


 And this versatile stamp set that makes great male cards

... also with a $180 order you can receive this comprehensive stamp set that is perfect for colouring and adaptable to many different occasions. 
and 
there is never a better time to JOIN STAMPIN' UP! with extra free product in addition to your chosen Starter Kit.
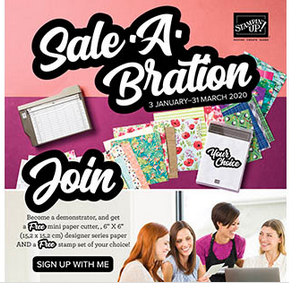

https://anncraig.stampinup.net/join_now

A quick reminder that these free products and the additional Join Stampin' Up! benefits are only available until March 31. If you are thinking about joining for the fabulous product discount or you'd love to start a home based business, don't leave it until the last minute as supplies of the FREE products are "while stocks last".
It's a great time to make the decision! 

Until Next Time,
Happy Stamping


Monday, 28 October 2019

Let It Ride Friendship Card

One of my favourite techniques is the Stamped Embossing Folder Technique that I described in a previous post and today I'm revisiting that technique using a different stamp set. 

Let It Ride is versatile for a variety of cards. I chose to place the smaller stamp of 2 horses grazing behind the Woodland Embossing folder.


I'm always amazed at how much depth can be achieved using this method, and while I like to keep things really fresh by swiping the inkpad onto the folder, other crafters create a different effect by using a brayer. 


The detail photos shows how I add more details using my Aqua Painter to paint additional colour onto the horse images, and to define the ground area so the horses are not floating in the background.
Don't forget to see details of how to do this technique on my Woodland Cars: Embossing folder male card post and if you have any queries, feel free to contact me.
A list of the products I used can be found below and all you have to do to get the products is click on the image of the product you would like. (Australian residents only) Everyone else contact your local demonstrator in your country.


Product List

Saturday, 3 October 2015

Guy Greetings for My Classic

Today's card was made for my husband who celebrated his birthday this week. I've been trying to make more cards for men and boys as my customers often request ideas for the men in their lives. 

Guy Greetings stamp set by Stampin' Up! is versatile and fun to use as it has quite a few different images and some great word stamps too. 

Here is the card I made.


I combined papers from the Go Wild Designer Series Paper Stack the stamps and the card base is made from the new Thick Whisper White.

The image is stamped in Memento Black ink and coloured with an Aqua Painter and Tip top Taupe ink. 


I love the effect of torn paper and my all time favourite Brads have to be the Antique Brads. 

Below, I've added a list of the items used to create this card.


Built for Free Using: My Stampin Blog

Tuesday, 22 September 2015

Woodland Cars: Embossing Folder - Male Card

My customers often ask for card ideas for the Males in their lives so tonight I decided to give it a try. As we make 6 cards in the class I wanted to keep it fairly simple, but of course it had to be eye-catching too. 

One of my favourite folders is the Woodland Textured Impressions Embossing folder - gorgeous in its own right, but I wanted something different. We were also using the Guy Greetings stamp set with some of the other cards so I worked out how to get the vintage car image behind the trees.

Here is the complete card.


So how do you get the image behind the trees? It really is quite simple.

First you swipe the folder with ink. I used Soft Suede and Night of Navy. Swipe across the folder so you get a random coverage and also get those gorgeous lines on the trees. Remember to swipe behind the side that has the "Sizzix" label on it (top Left corner) so you get the tree trunks as a positive (raised up) image. Just be careful not to put too much ink where you are planning to stamp. Also start with the lighter colour (Soft Suede) leaving clean spaces to add the Night of Navy ink. This is also swiped on randomly using the ink pad directly onto the embossing folder.

 The embossing folder is open with the fold join at the bottom of the photo.


Next you will stamp the car images directly onto the same part of the embossing folder in the position you want them to be. I used Memento Jet Black for this. Be careful to stamp straight down and up or you may smudge the image. I found a better image was achieved by holding the stamp in position for a couple of seconds giving time for the ink to transfer to the embossing folder.


Position the desired card size into the folder. Holding the folder firmly closed, you can check what your image will look like.  Make your sandwich, use the Multipurpose Platform open to Tab 1 and pass through the Big Shot
Voila! A really interesting image for you. It's always a bit serendipitous as to the outcome, but that is one of the joys of this technique. 


And yes the images print in mirror image so your cars will be heading a different direction.

I wanted to highlight the cars a little more so used an Aqua Painter and the Night of Navy ink to colour sections of the car, and some Soft Suede on the ground.


To add more definition to the image I sponged both Soft Suede and Night of Navy around the edges of the card before matting onto a Thick White cardstock base.


I have so many ideas of how to use this technique now, and cannot wait to try them. It really is easy and quite quick to achieve great results. I've taught this in 2 classes now, and it works in a group 0f 8 quite comfortably!

I hope you have enjoyed  this very rushed blog post, and that it helps you to give the technique a try.

Until Next Time

Happy Crafting