Showing posts with label Birthday. Show all posts

Tuesday, 15 March 2016

Birthday Balloon Celebrations with Faux Marbling

The Faux Marbling or shaving cream technique is so much fun. I tried it out for the first time today and combined it with the Balloon Celebrations stamp set from Stampin' Up!® It brought back memories of teaching marbling to my students at school many years ago, however this technique is far easier than mixing up bucket loads of wallpaper paste and dropping thinned oil paint onto the surface. 

I really love all the different colour combinations and patterns that can be made, and the ladies at class this morning had so much fun - they didn't want to go home! 

Here is the card I made using one of the simpler backgrounds.


and some details ....
I chose just 2 colours from the many re-inkers that I have from Stampin' Up!® and decided to make them somewhat harmonious as I was conscious of the fact that complimentary colours will neutralize each other if mixed together too much. 


 A hint with the Balloon Punch: punch the shapes first (they are side by side) then stamp them. Because the stamp is Photopolymer, it is easy to see where you are stamping and it saves a lot of angst about getting the images in the right place, or wasting card stock.


I had a little of the pattered background left over, so I punched a small heart and sponged the edges to give it definition. I'm considering a dash of Wink of Stella, what do you think? 

A list of the Stampin' Up!® products I used is below. You can see a video tutorial on the Splitcoast Stampers website. It is easy to follow. The only different step we did was to blot the shaving cream off the paper rather than rub it in a circular motion. The blotting leaves you with a much cleaner finish.

Until next time,

Happy Crafting


If you would like to purchase any Stampin' Up!® products you can easily do so by visiting my on-line store. Don't forget to add the monthly HOSTESS CODE (top right side bar) to be eligible to win free Stampin' Up!® products

Sunday, 21 February 2016

Water Coloured Rose Wonder Birthday Card

Today I have a  birthday card using 2 of my favourite techniques: - water colouring & heat embossing.
 I used the Rose Wonder stamp set from Stampin' Up! and the lovely Shimmery White card stock  that is strong enough to water colour without distorting. 

I've kept things simple today as I'm just getting back into stamping after a 2 week break helping my daughter with her new baby. I feel so lucky to have the opportunity to go interstate whenever I want, and to be able to share in my youngest daughter's joy. 

Here is the card.


The card base is Stampin' Up! Thick Whisper White. I use it for all my card bases now - it is a perfect weight to hold it's shape. Next I have an Always Artichoke mat then the embossed and painted layer of Shimmery White card stock.


I really enjoy the freedom of water colouring and love that it sometimes creeps outside the boundaries.  The flow of colour is so like some of the patterns seen in nature. 
I used Versa Mark ink and black embossing powder for the outline of the stamp, and Daffodil Delight, Melon Mambo and Cherry Cobbler inks for the flower. The leaves are Old Olive, Always Artichoke and a splash of Cherry Cobbler.


I stamped the greeting inside the shape (both stamps are from the Rose Wonder set), and then cut the shape with a coordinating Thinlit from the Rose Garden Thinlits Dies set.

The Venetian Crochet Trim has been "dyed" using a Sponge Dauber and Basic Black Archival Stampin' Pad. 

Below you will find a list of the products required to create this card. You are welcome to place an order via my on-line store where you can be eligible for the Hostess Rewards by using the ON LINE ORDER CODE  found at the top of the right side bar. (I randomly choose one on-line order each month to receive the rewards)

It is SALE-A-BRATION time - so a wonderful time to place orders and receive free products. Every $90 AUD spent enables you to choose 1 free item from the Sale-A-Bration Catalogue. Your orders will be sent directly to your designated address. You can shop in the Weekly Deals, the Clearance Rack, the Annual Catalogue and the Occasions Catalogue (Simply select the image on the side bar to be taken to these catalogues)

Also if you have been thinking of how to earn extra income while having a wonderful crafty time, Sale-A-Bration is a great time to join Stampin' Up! You can choose an extra $60 of free product in your Starter Kit - a total of  $295.00 worth for just $169.00. Contact me via my Demonstrator website for more details. I would love you to join my team no matter where you reside in Australia.


Friday, 8 January 2016

Celebrating Botanical Blooms Birthday Card and Sale A Bration at Stampin Up


It's a wonderful time of the year at Stampin' Up! where we are celebrating card making and paper craft with our biggest promotion of the year:
SALE -A- BRATION. 
plus 
the launch of a new Occasions Catalogue :
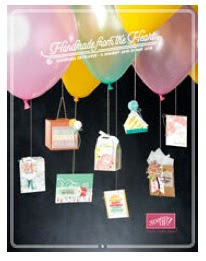
HANDMADE FROM THE HEART

Handmade from the Heart Catalogue

Click on the catalogue to see all the stunning new stamps and accessories, and as a bonus this catalogue is filled with a variety of Bundles. We all know that means a saving of 15% on those products PLUS spend $90 and receive a free item of your choice from the Sale-A-Bration catalogue.

The card I have for you today uses the Botanical Blooms Bundle


I've chosen to go with some of the lighter colours  in the Designer Series Paper stack for the background, then I added a Tea Lace Doily, some scrunched Linen thread and the die cut leaves and flowers from the coordinating  Botanical Builder Framelits Dies. A quick and easy card!


 I added extra colour to the centre of the flowers and finished the petals with a touch of the absolutely gorgeous Wink Of Stella Glitter Brush. If you love a little glitz on your cards then this item is a must have!

If you would like to order these items you can use my on-line store, and if you use the current Hostess Code, you will go into the draw to win the Hostess Rewards for this month.
Orders must be placed by January 30, 2016 (Australian residents only) and you must use the code:

FXHYCX47

 GOOD LUCK !

Built for Free Using: My Stampin Blog


Saturday, 3 October 2015

Guy Greetings for My Classic

Today's card was made for my husband who celebrated his birthday this week. I've been trying to make more cards for men and boys as my customers often request ideas for the men in their lives. 

Guy Greetings stamp set by Stampin' Up! is versatile and fun to use as it has quite a few different images and some great word stamps too. 

Here is the card I made.


I combined papers from the Go Wild Designer Series Paper Stack the stamps and the card base is made from the new Thick Whisper White.

The image is stamped in Memento Black ink and coloured with an Aqua Painter and Tip top Taupe ink. 


I love the effect of torn paper and my all time favourite Brads have to be the Antique Brads. 

Below, I've added a list of the items used to create this card.


Built for Free Using: My Stampin Blog

Thursday, 26 June 2014

Birthday Tags

My baby grandson turned one last week and tonight I have been to a 70th Birthday dinner and I made tags to attach to both gifts for these occasions. 


Getting a variety of colours in your image is easy using the Stampin' Write Markers directly onto the rubber image. Just colour the image with the brush tip of the marker and give it a "huff " to re moisten the ink. This means you don't have to rush with your colouring. 


And this is the tag I made for the little fellow for his birthday. I have always loved this bunny image - a set that I bought in my early days with Stampin' Up!. Just goes to show how so many of these images are timeless and can be used over and over again.

This time I hand coloured the bunny using a blender pen and ink squeezed onto the inside lid of the ink pad. I also cut up a Tea Lace doily and positioned it around the rabbit.


I'm on a bit of a tag making trend right now so you may just see a few more samples over the enxt few weeks. 

Until Next time

Happy Stamping,